Embroidery on clothing; Everything you need to know! 6x tips & tricks.
- Daphne
- Feb 27, 2025
- 6 min read
Updated: Mar 6, 2025
Making your own clothes a bit more beautiful or personalizing them with embroidery is a lot of fun to do and not at all difficult! In this blog I will explain everything you need to know about embroidery on clothing using 6 tips.

1: Choose an accessible material
In principle you can embroider on any piece of clothing if you try hard enough, it just has to remain fun so I would recommend staying away from some fabrics that make embroidering a lot more difficult!
Key Tips:
Choose a fabric without elastane
As a beginner, stay away from (too thick) stiff fabrics
Choose a non-transparent fabric
For example, thick denim is not recommended - you have to push your needle through the fabric with a lot of force every time. Sore fingers and a bent needle after a few stitches are common, I speak from experience 😉
A fabric with any form of stretch in it is also not recommended, to be able to embroider neatly you have to be able to stretch an embroidery hoop around the fabric without the fabric giving way too much. If the fabric deforms when you stretch it, your embroidery will either be much too loose when you take the fabric out of the hoop or much too tight and deform the fabric. On the label in a t-shirt you can see to what extent the fabric contains elastane, you should preferably avoid this completely!
Fabrics I like to embroider on the most:
100% cotton
Linen
For example, at Zeeman you can already get a nice basic white t-shirt of 100% cotton for less than 10 euros! Crazy but true: Shoes are also very easy to embroider on! For example, Converse shoes are perfect for a flower here and there. One last tip concerns the fabric, do not choose a fabric that is transparent, you will have to finish loose threads on the back of your embroidery and then it can sometimes be the case that you see ugly lines of thread that are tied to the back with a transparent fabric.

2: Choose a pattern that is not too detailed.
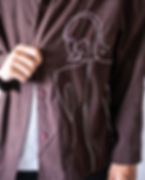
Embroidering on clothing involves a few more problems than embroidering on a piece of fabric in a hoop that is hung on the wall. The clothing needs to be worn and washed! Loose ends need to be finished off extra well (there are methods for this, which I will discuss later), but to avoid problems I recommend starting with a simpler pattern such as the line pattern on the jacket next to it! This way you can also see how the work stays on your t-shirt after washing, for example. It would be a shame if you spent hours on an embroidery that already contains all kinds of loose threads after washing twice. Below are some recommendations on where to find patterns!
3: Trace your pattern with water-soluble marker or use Soluvlies.
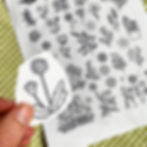
Have you chosen a white t-shirt to embroider on? Great! Then you can easily trace a pattern from a screen with a water-soluble marker. Invert the colors of the line pattern so that the background is black and the lines are white, you can do this with pinetools for example, google "invert colors image" and pinetools is one of the first websites that comes up. Via this website you can upload an image that is then automatically inverted (see the video below why this is so handy!).

Are you going to embroider on a dark fabric? Then Soluvlies is a good solution! This is interfacing that dissolves in water, a kind of very thin fabric-like sheet on which you can print the pattern or trace it yourself with the above method. You can then stick this sheet on the clothing, embroider through both the interfacing and your clothing and finally dissolve the Soluvlies with water so that only your embroidery is visible on the clothing.
4: Supplies
Good to have on hand when you are going to embroider on clothes:
Embroidery hoop, simple bamboo
Small scissors/snapper
Needle set with different sizes
Finger cap
Splittable embroidery thread
Pattern drawing pen
An embroidery hoop is needed to tighten the fabric you are going to embroider on and make it easy to handle. Embroidering on fabric that is not tightly stretched will definitely cause problems, because you will embroider the wrinkles too! A thread threader is a handy thing with which you can easily get thread through the eye of your needle, saves some frustration! A needle set with different thicknesses of needles is useful for beginners, I only knew what worked best for me personally after trying out many different sizes. The needle that works best also differs per fabric. With a large needle set at hand you can easily figure out which needle works best! I recommend a finger cap when you are going to embroider on denim, you will have to use a bit more force than usual and to keep a good grip on your needle and to save your fingers a rubber one works very nice. Finally I recommend splittable thread, standard embroidery thread consists of 6 different strands that are twisted around each other. You can split these 6 strands to make a much thinner detailed line with only 2 strands of the 6. This way you bring relief to your work.
5: Learn basic embroidery stitches by heart.

Never done any embroidery yourself? No problem! Modern embroidery consists of quite a few types of embroidery stitches, but once you get the hang of just the basics it is really easy to make whatever pattern you want! I have written a detailed guide that walks you through the 10 basic embroidery stitches with images as well as text. There's also loads of patterns included in the guide so you can start right away! I personally started embroidering 3 years ago and have collected every nit bit of information I found useful in there so I hope it can help you along as well. Here's a link to the modern embroidery stitches guide!
Curious to see what the explanations look like? I have also written a free blog post where I already explain 5 of the 10 basic embroidery stitches! With these 5 embroidery stitches you can get very far, you can embroider texts, flowers, twigs, bees - you name it! See the link: 5 embroidery stitches explained.
Embroidering text on clothing
Sometimes just a simple word or quote can be enough to make your garment a bit more unique. For embroidering text, I prefer to use the stem stitch or the running stitch. Embroidering text is fairly straightforward and can be done as a complete beginner. In the modern embroidery stitched guide mentioned before there is also a more detailed explanation on how it works!

6: Finish your embroidery properly.
Finishing your embroidery properly is super important when you have embroidered on clothing that will actually be used and worn. A wash can quickly cause your embroidery to come loose and of course you want to prevent that. Therefore, always wash clothing that has been embroidered in a laundry bag. Preferably tie the loose ends together, this is stronger than loose knots in the threads themselves. So do not cut the ends too short, but make sure there is plenty of length left to be able to tie the ends together! Afterwards, when there is a strong knot in it, you can cut the loose threads short. For extra strength, you can then add a backing fabric. Place this fabric over the back of your embroidery and iron it against it, it is intended to stay there permanently. This iron-on interlining works very well! However, this is not always necessary, I personally only do it with tote bags because a few keys sometimes got caught in the back of my embroidery. I didn't have this problem with t-shirts and it works fine without the backing!
Also important!
Are you a beginning embroiderer and do you have few to no items at home to get started? Then I recommend the large starter embroidery kit ! Not only because I put it together myself, but especially because it really contains everything you will need. It also includes a manual with 10 fun embroidery patterns and all basic embroidery stitches explained in detail with images. The 50 embroidery threads that are included will also be more than enough to make endless fun combinations.
Embroidery on clothing inspiration, follow us on instagram for more inspiration!


